Saturday, May 19, 2012

June 2012 Layout Class

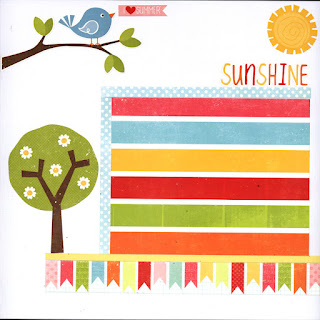
Hello my friends! Well it's that time again! Although I haven't held my May class yet (I'm glad to say that it's sold out), I have finished designing the 6 layouts for my June class.  Five of the eight kits I currently have available are already reserved. I might be able to get more and hold a second class if there is a demand for it. The layouts were created using Echo Park's Hello Summer.

So here they are, I really hope you like them, they are bright and were a lot of fun to put together!


.

Sunday, May 06, 2012

My May Layout Class

Hi everyone! Well it's that time again.  So I thought I'd share the six pages I created for my monthly layout class.


This is an Echo Park collection called Graceful. There is a lot of space for multiple pictures, though I do show possible photo layouts above!  There is a ton of paper, stickers and journaling spots left over to adde once the student has decided on pictures. Without the pictures it did look very flowery, but I think once the pictures are on there and journaling is added, they will look very pretty! Oh and the first layout was helped along by one of those new We R Memory Keeper Lucky 8 punches, I think the one I used was Lace Kerchief. I must say that the punch was very easy to use and unlike so many patterned punches, I did not feel like I was going to ruin my paper by miss-punching something! 

Hope you like the layouts!

M-C

Thursday, May 03, 2012

Love My New Markers!

Yup, I do love my new markers!  I love copics too, but the Spectrum Noir work just as well and are far more affordable!  Thanks to my birthday presents, I was able to get myself the full set and I've loved being able to play!  Yup, I'll say it, coloring stamped images takes me back to the many hours my grandmother and I colored when I was a wee little one!  Here are some of the cards I've created with the Spectrum Noir!


 For the record, there are currently 168 different markers available.  They come in packs for 6 of which there are 12 and also in 4 sets of 24. Because of the way the Spectrum Noir system is set up, you  really need to start with the Essentials pack and then get your favorite colors by adding the six packs.  The sets of 24 are really add ons to the basic sets of six. Here is a list:

Packs of 6
Essentials
Reds
Blues
Browns
Greens
Purples
Pinks
Turquoises
Cool Grays
Warm Grays
Yellows
Pales (good one for coloring faces)


Sets of 24


Pastels
Brights
Lights
Darks


I also gave a lot of consideration to how I would store my markers.  I've had a few copics for a year or so, and I was hauling around a couple of those 36 marker cases. I honestly didn't like them much, the markers kept on falling out of the dividers and it took too long to pack them up if I wanted to move to another room or go and crop at a local store or at a friend's place. I looked on YouTube and liked the idea of a tower, but how do you bring an open tower to a crop.  It suddenly dawned on me that I already had something in my craftroom that would likely do the trick and it did! An ArtBin Giant Semi Satchel!

The satchel already comes with four shelves, and few pieces of cardboard to create dividers between the different colors and I was all set.  The markers are stored the way they should be horizontally, and all I have to do is close the lid and I'm all set to go!

I know that this will seem crazy, but I wanted to share my luck, so I opened a Zibbet store!  Right now you can get a huge Spectrum Noir bundle for less than $276 for all the pens plus the DVD, some paper and more!  Check them all out here. If I'm sold out, please just contact me.  I don't sell from my blog, but this deal I found just had to be shared!



Monday, April 02, 2012

Cards

I had a lot of fun making these, one for a swap in a Facebook group and the other just because...literally! I just felt like working a little with my Copic markers to see what I could come up with.  I don't think the shading is perfect, but I do like the color combination! You can click on them if you want to see the details! Hope you like them!


For some reason that Marci made me think of getting all dressed up for Easter! So Happy Easter to all of you who celebrate it!

Have a great week,
M-C

P.S. To my coloring coach, Carole, I was thinking of you as I was coloring my Marci!

Thursday, March 29, 2012

New Mini Album

I finally made another mini album!  For those who know me, they are my first love! They challenge my creativity and make me happy when they are done. I don't have to have pictures for them since for the most part I either sell them of give them away!

This one was created using the DCWV Coral Couture stack as well as the mini stack and mini cardstock stacks from the same collection.  The chipboard is Melissa Francis and was painted with Turquoise acrylic paint from JoAnns. The flowers are from Recollection, Wild Orchid Craft as well as from Prima and Petaloo!  When it comes to flowers, I love them all!  I've also thrown in some lace that I bought on line from an Etsy vendor. Unfortunately it sat in my stash for quite a while and there was no name on the tags that the lace was on, I can't tell you who. I added some Recollection trinkets (all of which were formally Primas) as well as some ribbon and a couple of Prima journalling spots.  For more details, come back in a day or two and check the sidebar for the YouTube video or you can check out my YouTube channel directly ar http://www.youtube.com/user/mccplg. I wanted to post it today, but I'm used a new camera (it's the panasonic I got for my birthday a year ago) My first attempt using it as a video showed a spectacular video with great clarity, which unfortunately stopped before the end of the shoot, likely because I ran out of space on the card.  So I will try again tomorrow!

I did set aside one of everything I used plus some additional 12x12 papers from the Coral Couture collection.  If you are interested in that kit, please contact me! I am charging $29 plus $6.00 shipping. If the shipping is less, I'll return the difference.

Here are the inside pages of the mini:
Inside front cover - the orange matted flower
can be pulled out and used a s a journalling spot.

I really didn't want to cover the bird,
 so there are a couple of cards in the envelope
for adding small pictures and journalling.


The family sign is mounted on a little holder
 I made from one of the 12x12 sheets. See what it holds below.


What can I say!  I love pockets and envelopes.
There is room on the actual pocket and two mats inside it
for pictures and journalling. Personally, I'd journal on the one
 with the bird, I'd just hate to hide it!

Another place to hide a mat! Just pull on the tab!


This paper was so pretty, I just didn't want to hide it!
Instead I cut the 12x12 paper so that the pretty part would fit !
I fussy cut the flowers from the 12x12 paper and actually
pop-dotted another cut out flower on top.
I then adhered it on three sides as a pocket
 that I put a bunch of goodies in.


What's a mini without more pockets and spaces for pictures?
This is actually an envelope which also contains a mat!

Here is what I slipped into the pocket
of the page  in the above picture!

The back of the envelope with mat from the mini mat stack,
 little lace and a couple of Prima flowers with a pretty brad!

Another pocket page made with paper from the 12x12 stack.
Such a pretty place to journal and there is a mat inside the
pocket for a couple of pictures.
Back of the pocket, a nice place for a picture.

A nice spot for a vertical picture.

Lots going on here!  This is an envelope left open at the top.
There are a couple of tags and...
This card, with pretty mats on all 4 panels slips into it,
hiding yet another mat glued down right on the envelope!

A little lace, some pretty flowers and some delicious paper from
the 12x12 stack adhered to the Melissa Francis chipboard and
voila! Sorry for the glare, but dreams do come true!

And finally, the back cover,
painted and distressed a little!
I know this was long with loads of pictures, but I do hope you enjoyed!

Thank you so much for looking and have a terrific time until we speak again!
M-C

Saturday, March 24, 2012

April Class gets doubled!

When we first looked at the Echo Park Happy Days, many of us thought, :Oh that is just for 50's layouts"!  But the kit can do much more.  That is what I set out to show in these layouts, which are now being added as a second class in April!  Hope you like them!


Have a great weekend!
M-C

Friday, March 23, 2012

Dave's Cave

When my friend Charlene moved into her new condo, I made a plaque for her for her new craft room. You can see it here.  I mentioned that I wanted to make one for her husband Dave, as he would now have a man cave. It was a lot of fun adding paints and distress ink and even stickles and glossy accents to the original wood plaque that I bought at JoAnn's.! I was invited to Dave and Charlene's this past Wednesday and got to give Dave his plaque in person! I think that Dave liked his plaque!


Believe it or not, I also used Jolee's Trees and mounted them on foam to give then depth and dimension. To make sure they were not too fragile, I coated them with Glossy Accents after I had shaded them. Because I didn't want the to look too glossy, I added a layer of ink on top of the Glossy Accent. I also inked the letters with Distress Ink, so they wouldn't look so lime green!

Thank you so much for looking and please feel free to leave a comment!
M-C